You will learn how to configure:
- Visibility
- Opacity
- Brightness / Contrast
- Point size
- Color / Elevation view mode
- Single-band / Multiband view mode
- Elevation range
- Limit box
- Transformation
- Rate the platform
- Next steps
Visibility
Every data item in a project, including chunks and groups, has a visibility setting.
To turn an item’s visibility on or off, click the eye icon to the right of the item name in the Workspace panel.

Opacity
Raster maps, Digital Elevation Models (DEMs), Tiled Models, and 3D Models support transparency settings.
To change an item’s opacity:
- Select the item in the Workspace panel on the left.
- Open the Properties panel on the right.
- Under the Style section, adjust the Opacity value as needed.

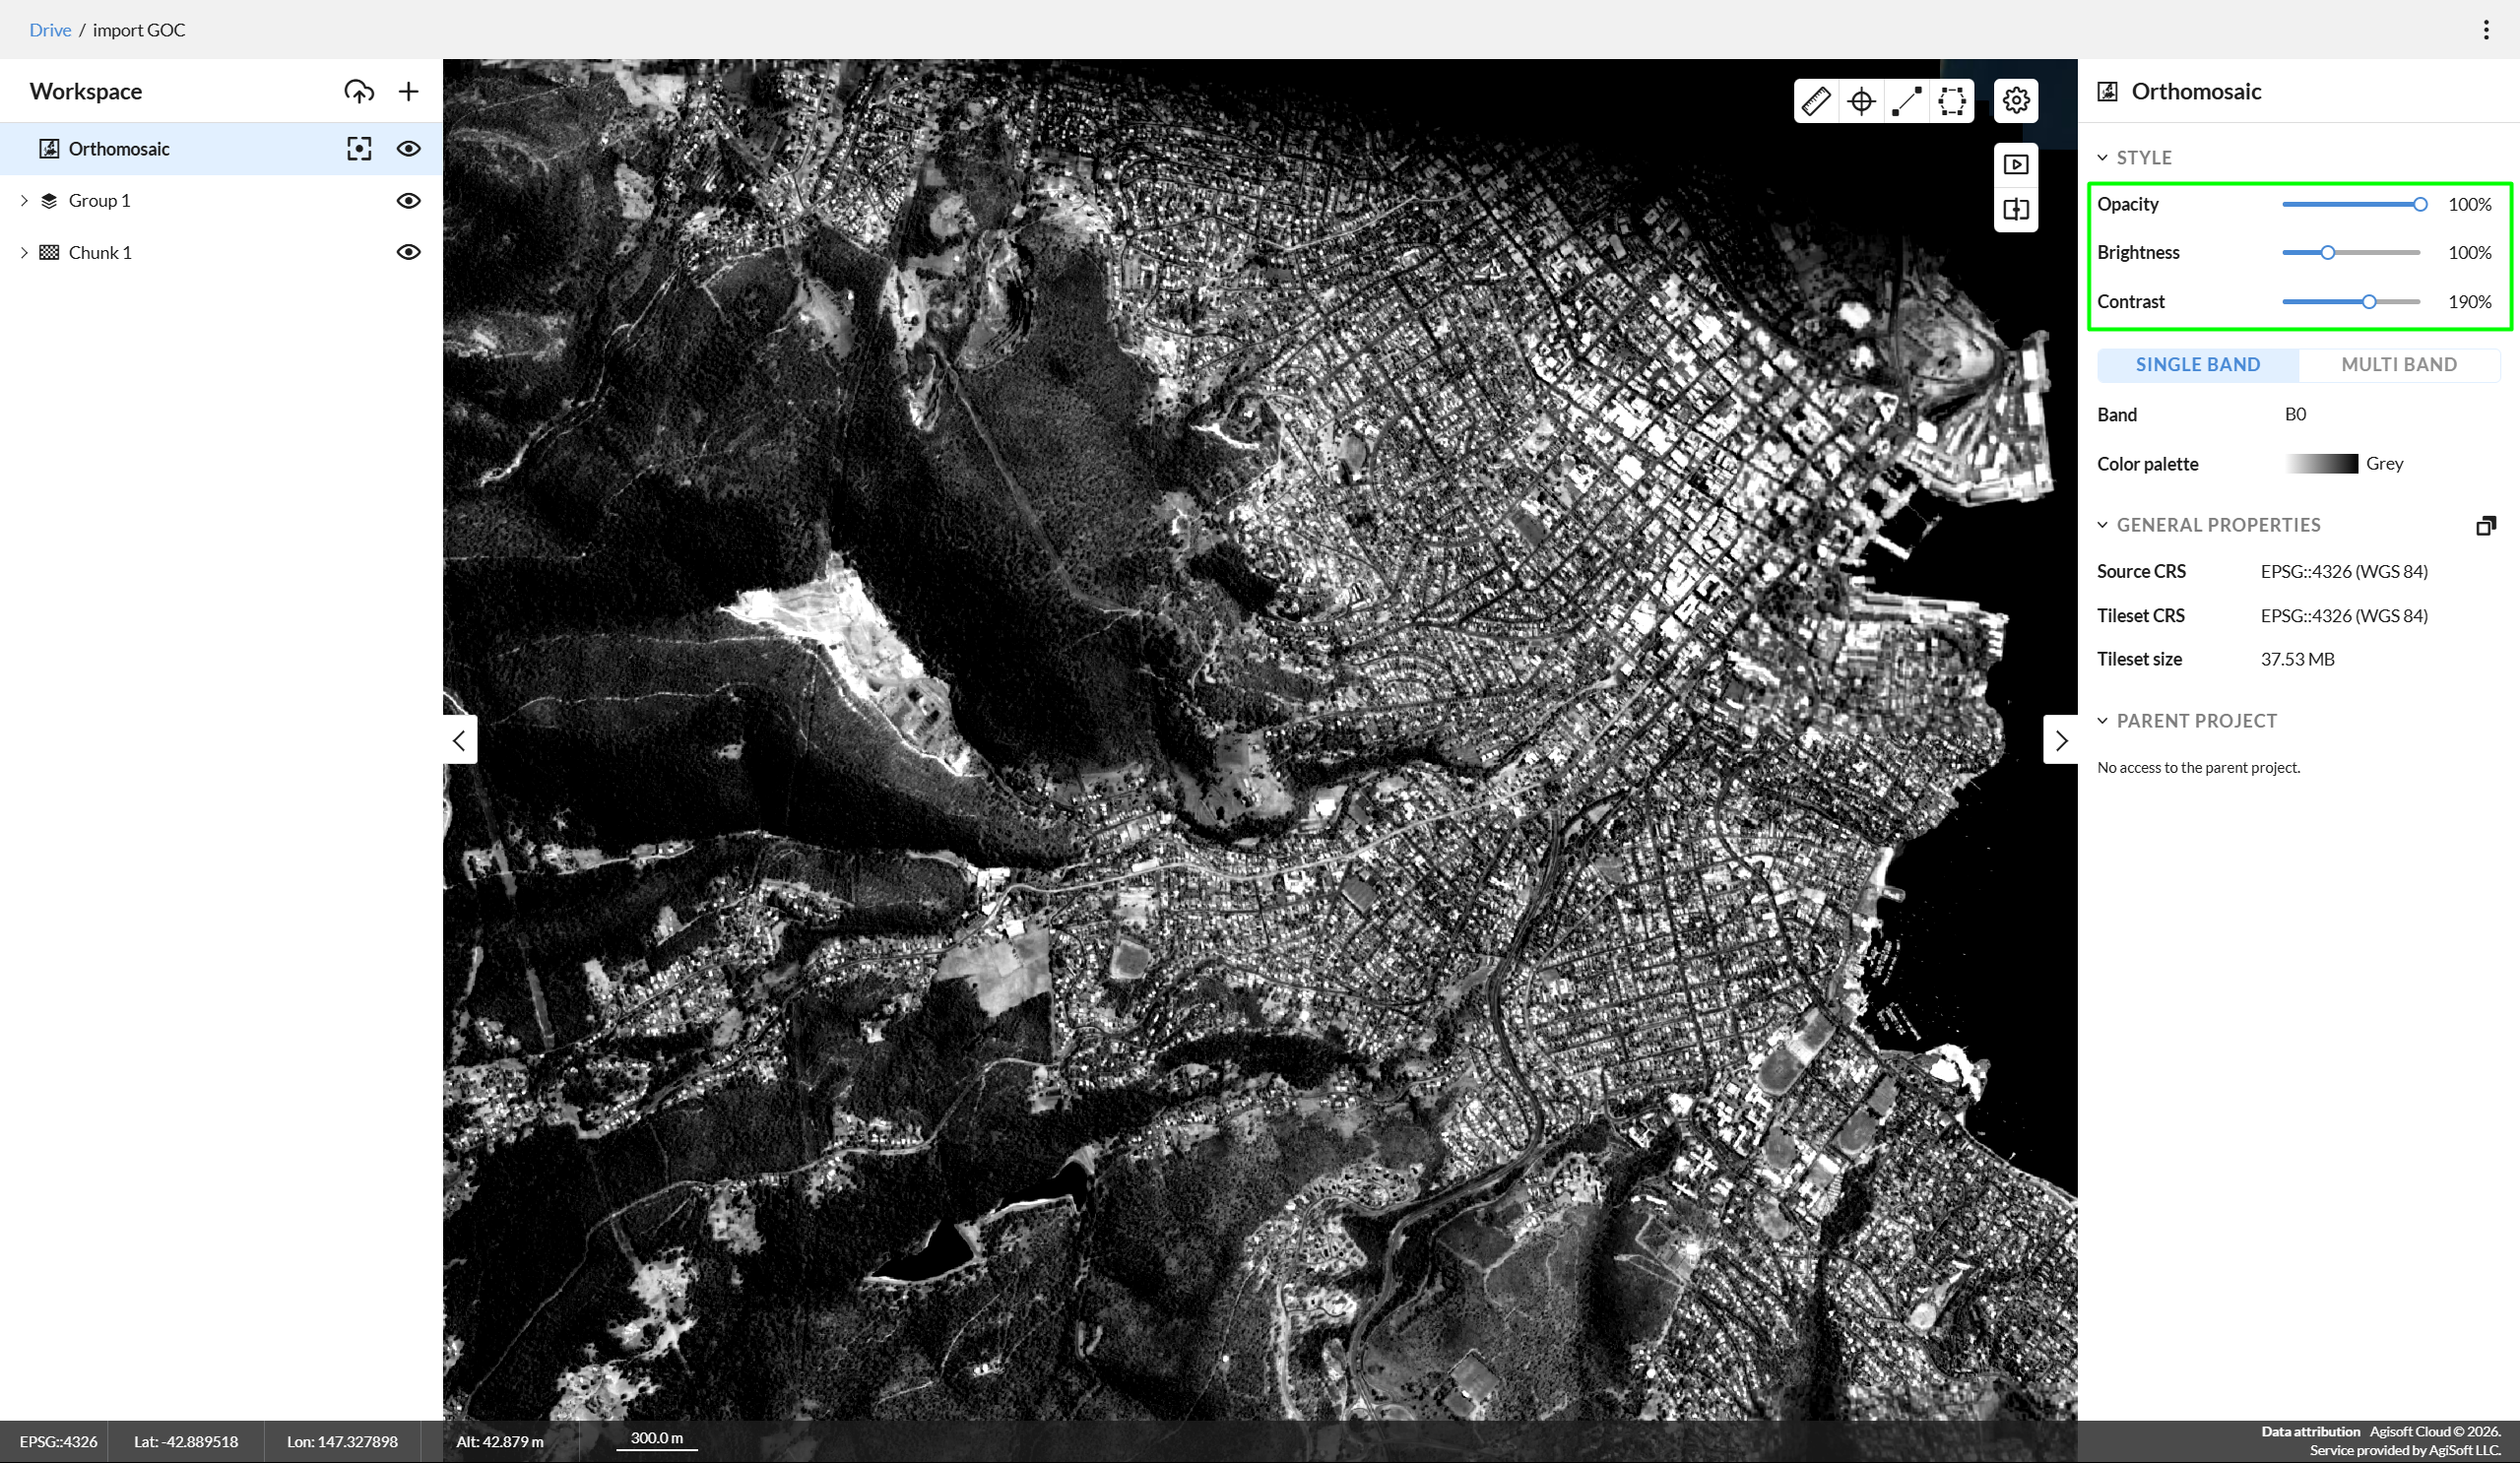
Brightness / Contrast
Raster maps support brightness and contrast settings.
To change an item’s brightness or contrast:
- Select the item in the Workspace panel on the left.
- Open the Properties panel on the right.
- Under the Style section, adjust the Brightness or Contrast value as needed.
Point size
Point clouds have a Point Size setting.
To change the point size:
- Select the point cloud in the Workspace panel on the left.
- Open the Properties panel on the right.
- Under the Style section, adjust the Point Size value as needed.

Color / Elevation view mode
Tiled Models, 3D Models, and Point Clouds support two view modes:
- Colors
- Elevation
To change the view mode:
- Select the item in the Workspace panel on the left.
- Open the Properties panel on the right.
- Under the Style section, select the desired View mode.

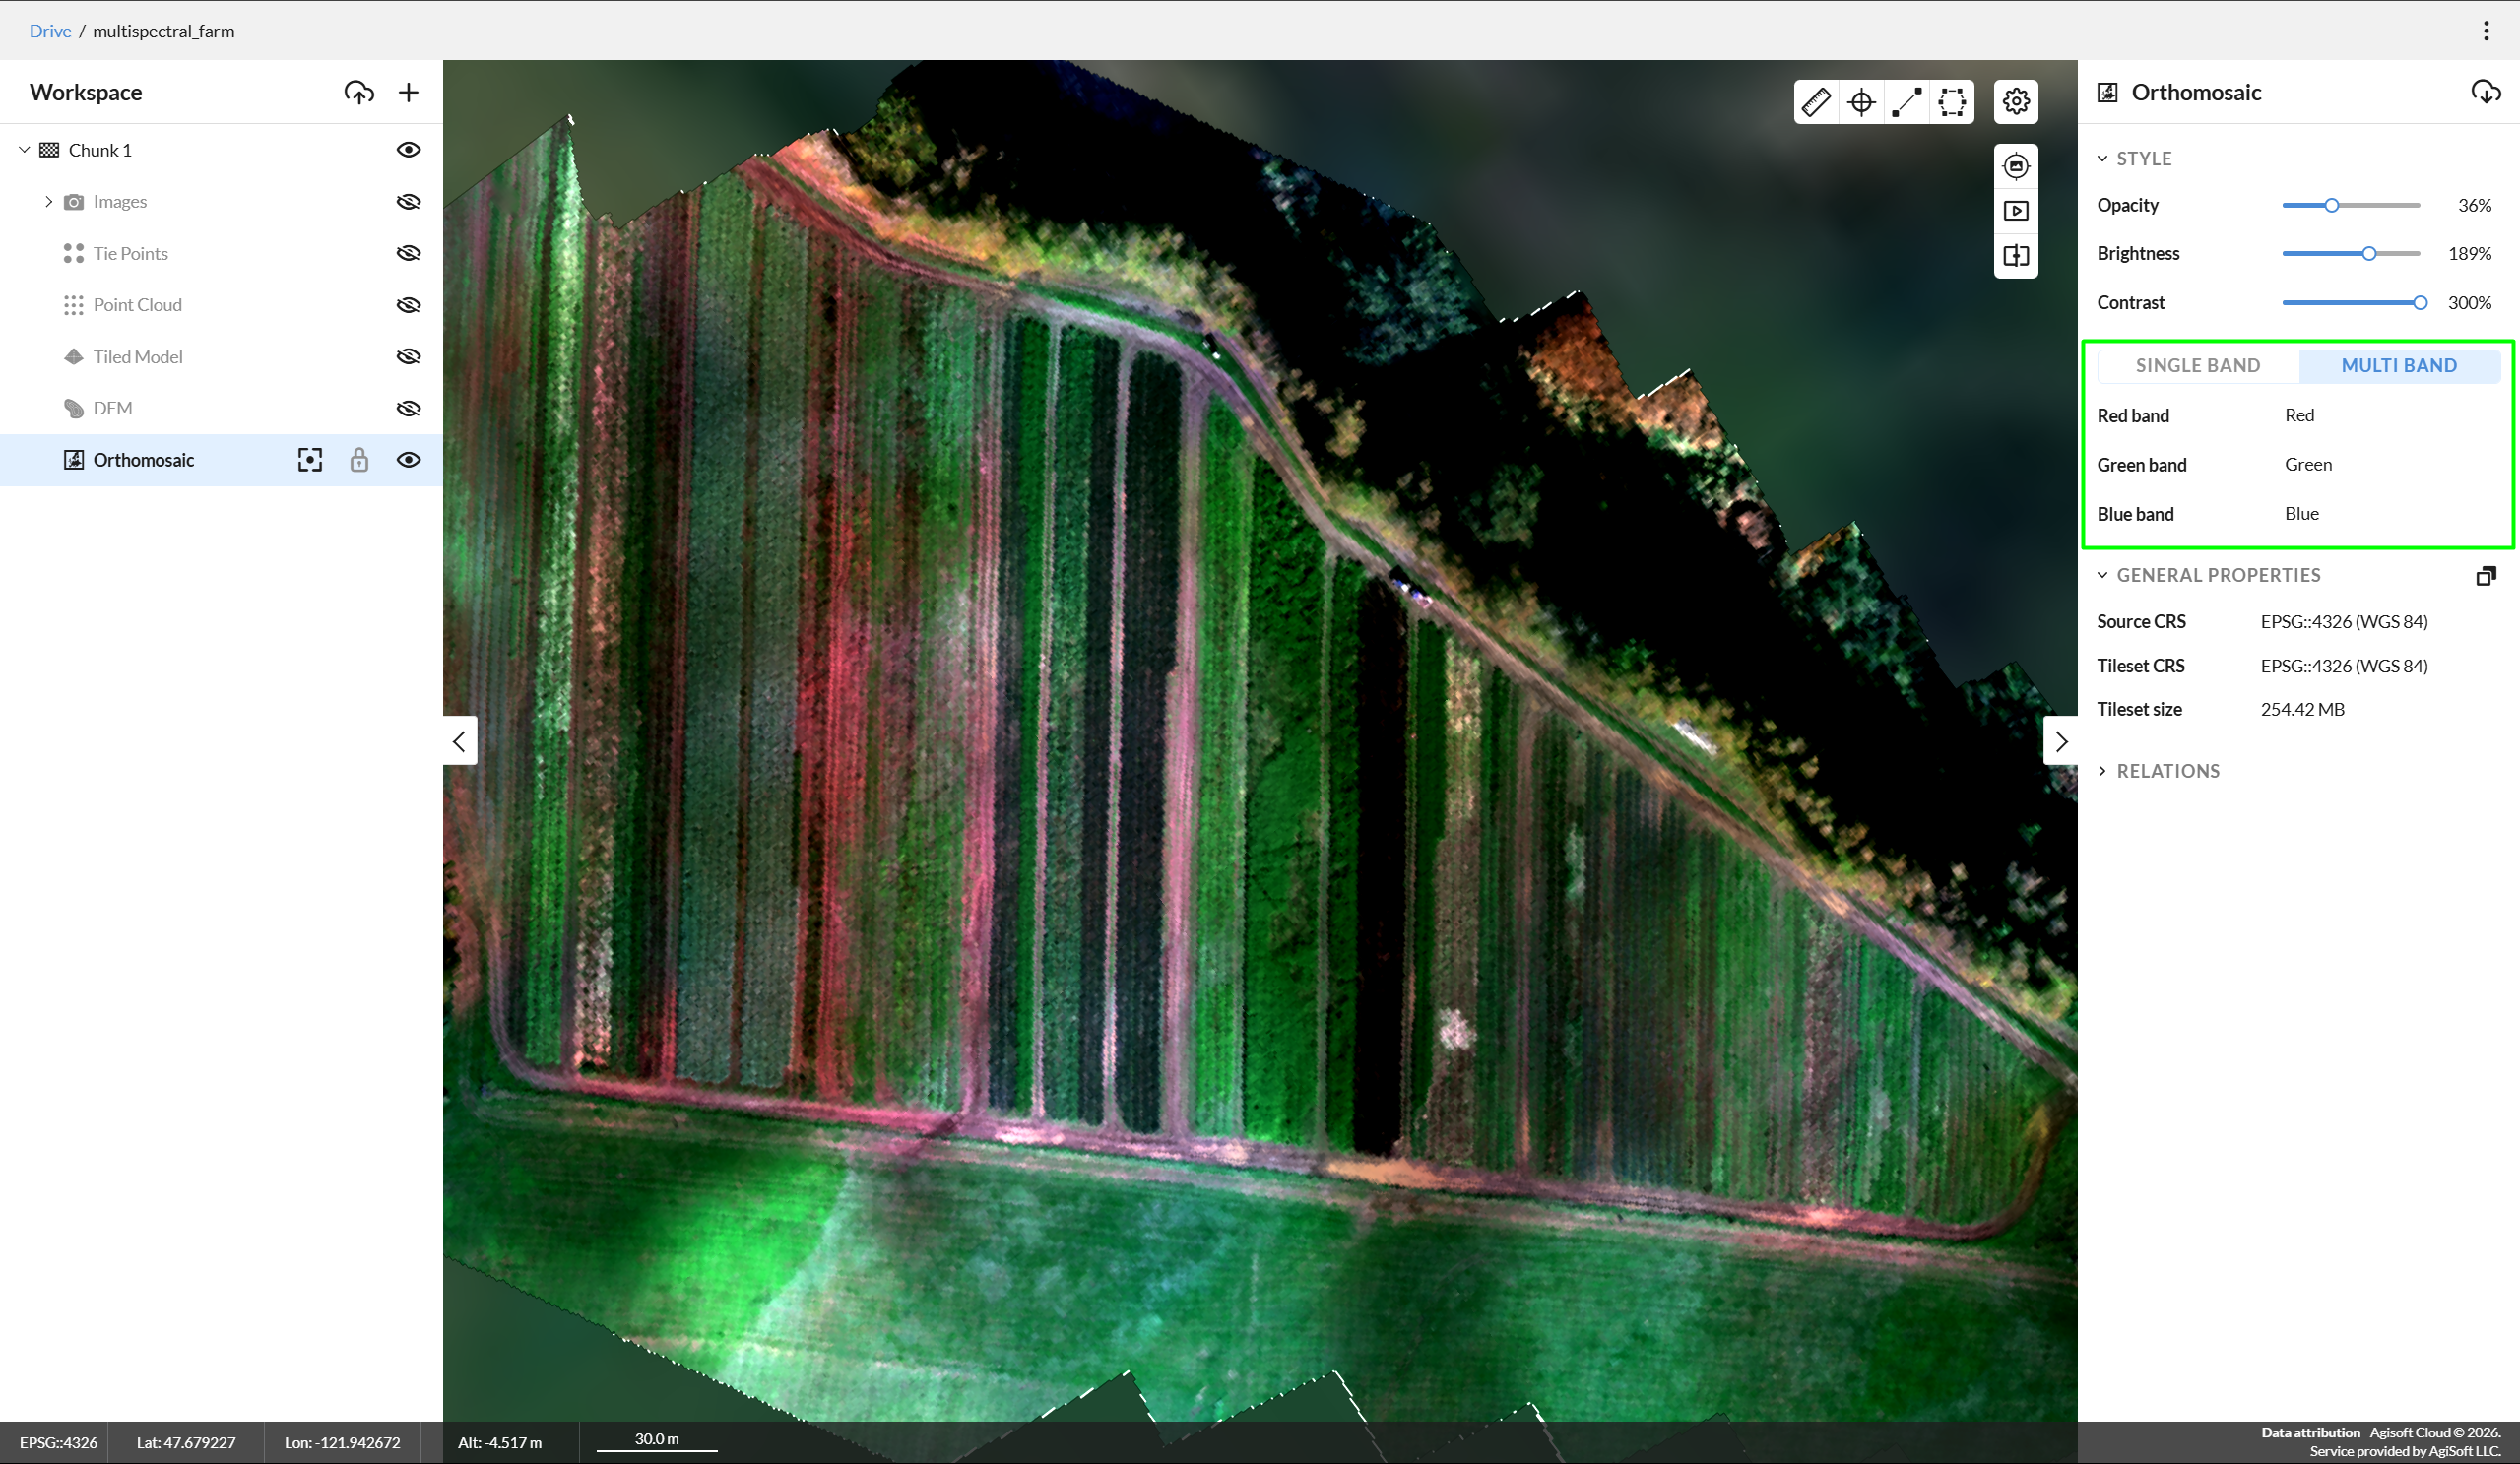
Single-band / Multiband view mode
Please note that this feature is only available for raster maps uploaded after the feature release date (July 2, 2026). If you would like to use this functionality, please re-upload the relevant datasets. If the required orthomosaic is part of a .psx project, please re-publish the project.Raster maps support two viewing modes:
- Single-band – Displays a single raster band visualized using a color palette.
- Multiband – Displays a composite image created from multiple bands, where each selected band is assigned to the red, green, or blue channel.
To change the raster map view mode:
- Select the item in the Workspace panel on the left.
- Open the Properties panel on the right.
- Under the Style section, select the desired View mode.
When in single-band view mode you can select the band to render and color palette to colorize it.
When in multiband view mode you can select which bands will interpreted as red, green and blue channel.
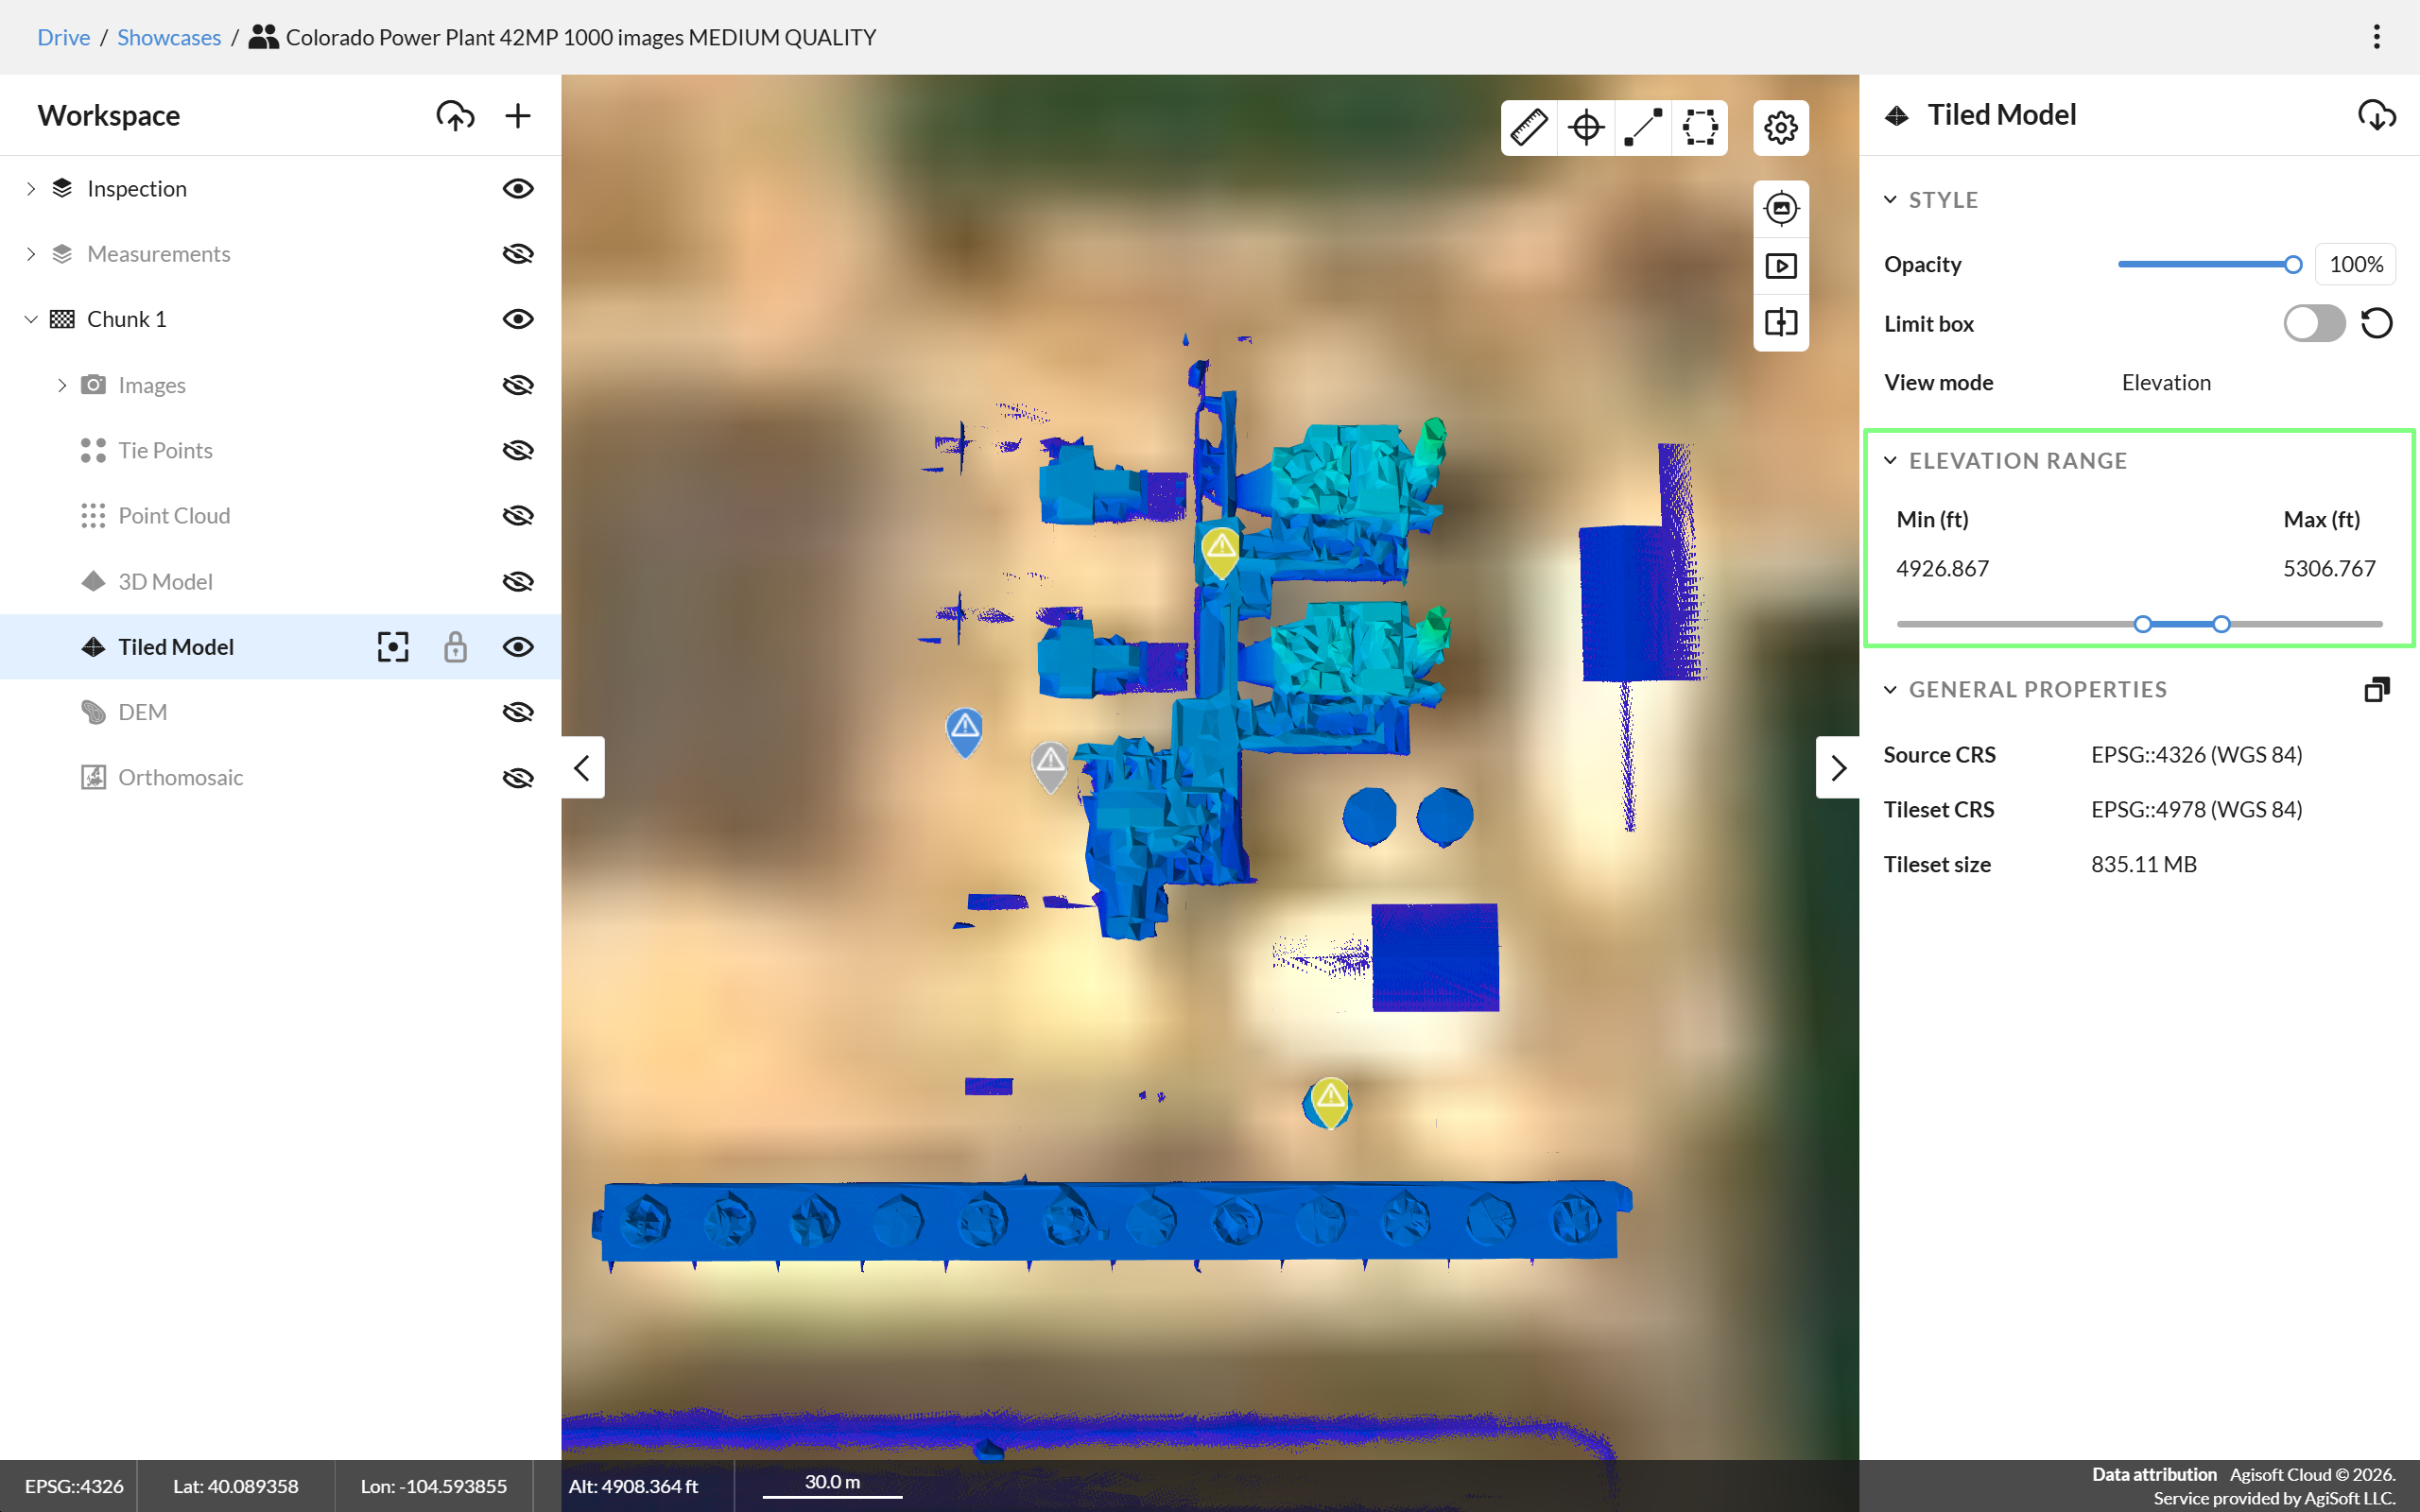
Elevation range
Please note that elevation range configuration is only available when the project coordinate system is configured as WGS84 EPSG::4326.
Tiled Models, 3D Models, Point Clouds and DEMs support elevation range control allowing to filter the data out of configured range.
To configure the elevation range:
- Select the item in the Workspace panel on the left.
- Open the Properties panel on the right.
- Under the Elevation range mode section use slider or manual input to adjust minimum and maximum elevation of the range.
Limit box
Tiled Models, 3D Models, and Point Clouds include a Limit Box feature that allows you to restrict the visible area of the data.
To adjust the limit box:
- Select the item in the Workspace panel.
- Open the Properties panel on the right.
- Enable Limit Box adjustment mode.
- In the 3D Viewer, drag the limit box planes to adjust the visible area.
Additional options:
- To exit limit box adjustment mode, disable it in the Properties panel.
- To reset the limit box to its original size, click the Reset button.

Transformation
Tiled Models, 3D Models, Point Clouds, and Chunks defined in a local coordinate system support transformation settings, allowing you to adjust position, rotation, and scale.

Translation
To move an item:
- Select the item in the Workspace panel.
- Open the Properties panel on the right.
- In the Transform section, click Translate.
- Enter the desired position values and press Enter to see the result in a scene.
- Click Apply to confirm.
Translation is only available when the project coordinate system is set to WGS84 (EPSG:4326) in the project settings.

Rotation
To rotate an item:
- Select the item in the Workspace panel.
- Open the Properties panel on the right.
- In the Transform section, click Rotate.
- Enter the desired rotation values and press Enter to see the result in a scene. .
- Click Apply to confirm.

Scale
To scale an item:
- Select the item in the Workspace panel.
- Open the Properties panel on the right.
- In the Transform section, click Scale.
- Enter the desired scale values and press Enter to see the result in a scene. .
- Click Apply to confirm.

Rate the platform
We would appreciate it if you take a short survey on your experience with the platform so we can continue improving it with regard to your feedback.
Survey link: https://forms.gle/C3DMcFwiY6aPWXo76