PyCharm makes it possible to use the virtualenv tool to create a project-specific isolated virtual environment. The main purpose of such virtual environments is to manage settings and dependencies of a particular project regardless of other Python projects.
Create a virtual environment with Python 3.5, 3.6, 3.7, 3.8, 3.9, 3.10 or 3.11 install Metashape wheel there (latest version is available from Downloads page) and use interpreter from this python environment in PyCharm.
on Windows
Run cmd.exe with the administrator privileges and use the following commands:
Install virtualenv module:
python -m pip install virtualenv
Create virtual environment:
python -m virtualenv myenv
Activate created environment. After this command is executed, "(myenv)" indicator should appear in command line:
myenv\Scripts\activate.bat
Install Metashape module in environment:
pip install "%USERPROFILE%\Downloads\Metashape-2.0.3-cp37.cp38.cp39.cp310.cp311-none-win_amd64.whl"
Then go to PyCharm > File > Settings... > Project > Project Interpreter > Click  > Add... > Existing environment > ...\myenv\Scripts\python.exe
And use:
import Metashape
instead of "import Metashape" in the script body.
With this, the auto-completion of Metashape module-related commands would work.
on Linux
Via bash run the following commands :
python -m pip install virtualenv
python -m virtualenv myvenv
source myvenv/bin/activate
pip install ~/Downloads/Metashape-2.0.3-cp37.cp38.cp39.cp310.cp311-abi3-linux_x86_64.whl
Then go to PyCharm > File > Settings... > Project > Project Interpreter > Click > Add... > Existing environment > .../myenv/bin/python
And use:
import Metashape
instead of "import Metashape" in the script body.
With this, the auto-completion of Metashape module-related commands would work.
Install Metashape Package in PyCharm
To install Metashape in PyCharm you need to run the following steps:
Download Metashape module from our website - https://www.agisoft.com/downloads/installer/. In our example we used metashape-2.0.3-cp37.cp38.cp39.cp310.cp311-none-win_amd64.whl
1. Open PyCharm.
2. Select File > New Project in PyCharm and choose New environment - Virtualenv:

And click Create button.
3. After that click Python Packages > Add Package > From Disk:

And in the Install Package dialog window specify the path for Metashape-2.0.3-cp37.cp38.cp39.cp310.cp311-none-win_amd64.whl file:

Click OK button.
If you get an error as on the image below:

You need to click on Details... and Copy text from the Troubleshooting steps section:


Please note, that you need to delete file:// from the copied command before executing in cmd.exe, as shown above.
- Metashape package will be displayed in the Python Packages section:
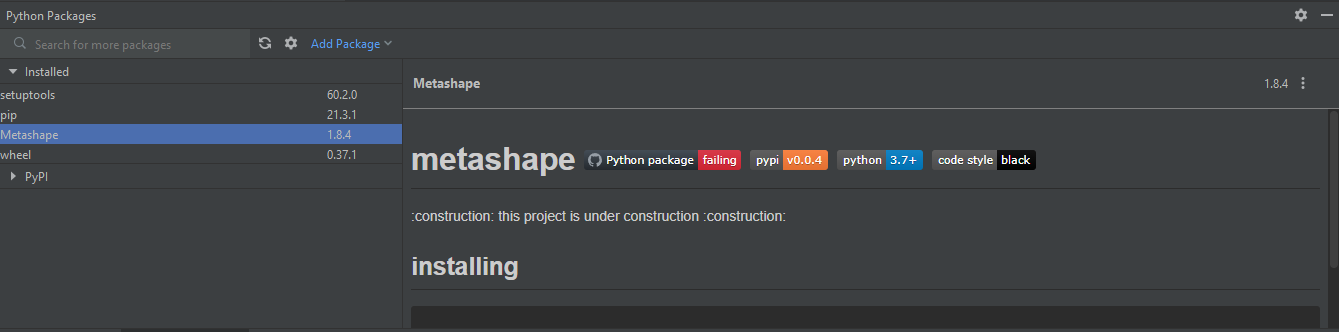
- Also you can call import Metashape command in your script/interpreter now, for example:
import Metashape
print (Metashape.version)
