

In the new version of Metashape, we have optimized the performance of texture construction when using the Natural blending mode. We have also changed the matching algorithm and added the ability to train the classification. And added native support for Windows/Linux for ARM64 platforms.
Please pay attention that at the moment the processing nodes in Agisoft Cloud are running on Metashape 2.3. We plan to update Metashape on Agisoft Cloud in the near future. If you need to use the cloud processing service, please use Metashape 2.3.
Below there is the list of main features added in version 2.4.x:
Download Agisoft Metashape 2.4
Agisoft Metashape 2.4.0 pre-release is available and can be downloaded from our forum:
https://www.agisoft.com/forum/index.php?topic=17603.0
New features in Metashape 2.4.0
Align Photos
A new matching algorithm
The algorithm for selecting key points has been updated, and the descriptor has also been updated. The matching goes from a coarse level to a detailed one. Thus, the new algorithm makes it possible to find more matches in complex scenarios, such as fields or forested areas and so on.
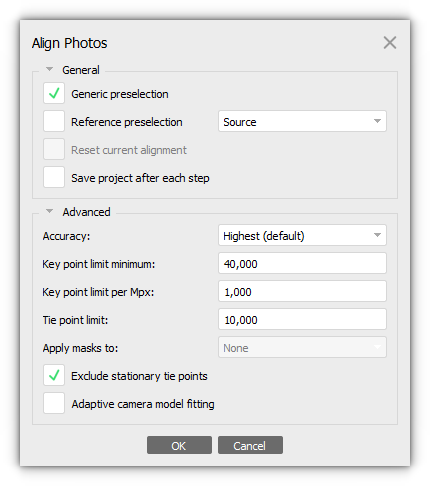
By default, Accuracy is now set to Highest. In this case, the algorithm will automatically select features for all downscale levels (starting from Lowest up to Highest) for the most accurate alignment.
Please note that Guided image matching option was removed from Align Photos dialog (it is now an integral part of the algorithm).
Now it is important to specify the minimum value for key points, as well as to specify the key point limit per Mpx, which was previously done for Guided matching. The number of detected points per image is calculated as (Key point limit per Mpx) * (image size in Mpx), but not lower than Key point limit minimum value.
Automatic classification
Training classification
We have added the ability to train classificator on a user‑labeled point cloud. Metashape uses the Gradient boosting model for training. More accurately the classes are defined in the source point cloud, the better it will be for training of model for classification. For training we recommend to use point clouds that are similar to the area you would like to classify.
Training is available from the Classify Points dialog window (select Tools > Classify Points > Train new classifier):
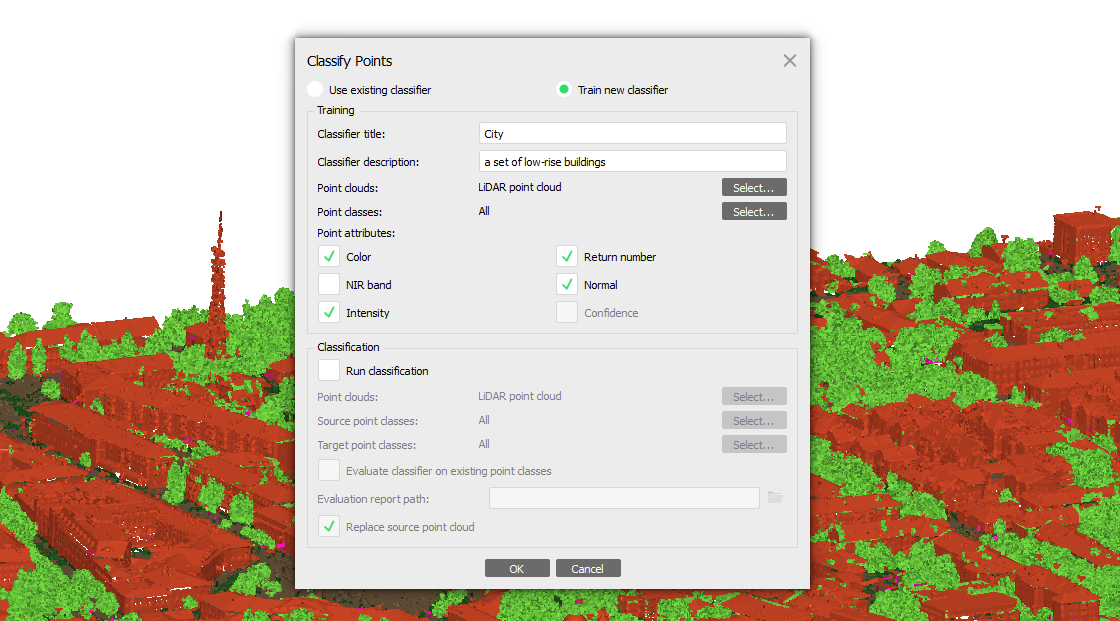
In the dialog box, you can specify a description for the classifier. You can also select the point cloud to use for training (in our example, it’s called Train), and you can also specify which classes you want to train (the list will include those classes that are defined on the training point cloud). You can also define attributes (Color, NIR band, Intensity, Return number, Normal, Confidence) for the classes.
You can either perform only training or immediately start classifying the point cloud by enabling the Run Classification option. You can select several clouds for classification at once. However, they will be classified one after another.
The list of classifiers will be displayed in the Use Existing Classifier tab (select Tools > Classify Points > Use Existing Classifier).
To run automatic classification, it is important to have a trained model.
If you had trained several models, you can choose one of them and also specify the required point cloud for classification and the classes you want to classify.
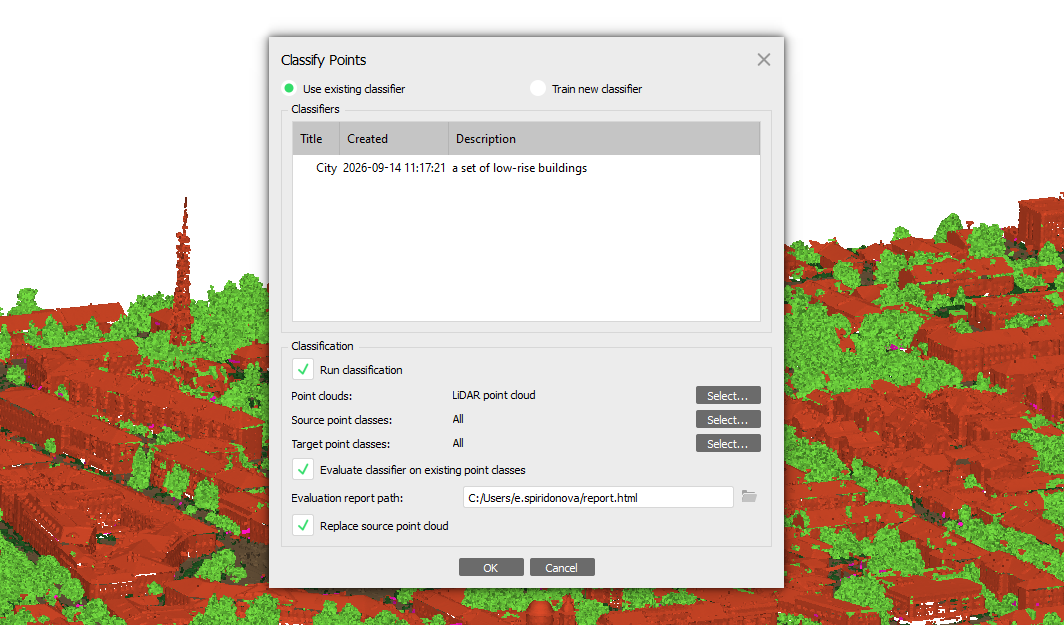
It is also possible to save the report when using multiple classifiers. It is important that the source point classes and the target point classes match. The report will be saved in HTML format.
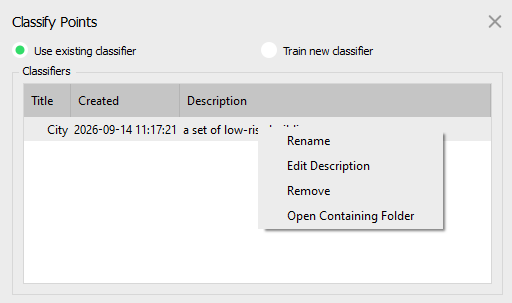
Editing the classifier model is available from the context menu:
Texture
Natural blending - improved
Performance optimization of the Natural blending algorithm.
ARM platforms
Added native support for Windows/Linux for ARM64 platforms.