Agisoft Metashape Professional supports the processing of stereo satellite imagery using rational polynomial coefficients (RPCs) provided with each image. Examples of supported satellites: Beijing-3A, Ikonos, Planet Labs, Pleiades, SuperView, Jilin, WorldView.
RPC coefficients can be loaded from supplementary rpc.txt, .rpb or DIMAP .xml files (single tile only), as well as from RPC coefficient tag of TIFF images meta data.
This article provides information about the main steps for processing satellite imagery in Metashape:
This tutorial is based on sample Pléiades Tristereo imagery over Melbourne, Australia. You can find other similar datasets from Airbus Defense and Space - https://www.intelligence-airbusds.com/imagery/sample-imagery/
Adding images to the project
1. Before adding satellite images to the project make sure to enable Load satellite RPC data from auxiliary TXT files option in the Preferences dialog. To do that select Preferences... command from Tools menu, switch to Advanced tab and turn on Load satellite RPC data from auxiliary TXT files option.

DIMAP format support is limited to single tile images only. Tiled DIMAP images need to be combined before adding to Metashape project.
Install Python and GDAL on your computer and use the following commands:
gdal_translate DIM_<datasetname>.XML combined.tif -co TILED=YES
gdaladdo -r average combined.tif 2 4 8 16 32
For example, on Windows, the command is executed via the command line:NOTE: there may be a problem when using an XML file. In this case, we recommend using the same command but for files *.TIL or *.IMD.

2. Select Add Photos... command from Workflow menu to add images to the project. Browse to the folder containing satellite images and select the image files to be added to the project. In our sample data set each .jp2 image is located in a separate folder, so we need to repeat this step 3 times for each image.
3. Make sure that RPC coefficients were loaded correctly. To do this select Camera Calibration... command from Tools menu and verify that Camera type is automatically set to RPC for all calibration groups with loaded satellite images.

4. Satellite images may require brightness adjustment for optimal display. Select Set Brightness... command from Tools menu to adjust image brightness. In the Image Brightness dialog click Estimate button to calculate default values and then OK button to close dialog.

Satellite images often have very large resolution and navigation in the Photo view may be slow. Metashape can take advantage of multi resolution TIFF files with overviews, which greatly improve user experience.

If the available satellite images do not contain overviews, you can generate them using Convert Images command from the Export submenu from the File menu.
Align images
1. Select Align Photos... command from the Workflow menu. In the Align Photos dialog set suitable processing options. Guided image matching option can be used to increase the number of detected tie points.

2. Click OK button to start processing. After processing is finished a tie point cloud will be displayed in the Model view.

Build DEM
1. Select Build DEM command from the Workflow menu. Set the following recommended values for the parameters in the Build DEM dialog:

2. Click OK button.

To generate a digital terrain model (DTM) use Build Point Cloud... command from Workflow menu instead, followed by ground points classification and DTM generation based on classified ground points. Please refer to Point Cloud Classification tutorial for more details.
Generating model from DEM and build tiled model
1. Select the Build Model... command from the Workflow menu.
2. In the Build Model dialog box set parameters for building polygonal model from generated DEM:
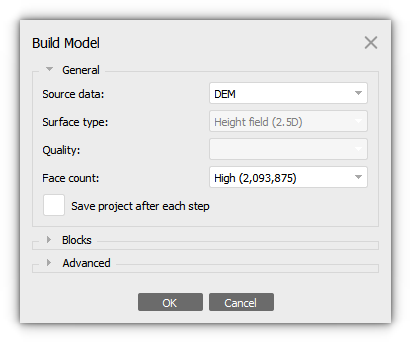
3. Click OK button.
4. Select Build Tiled Model... command from Workflow menu.
5. In the Build Tiled Model dialog set processing parameters to use:
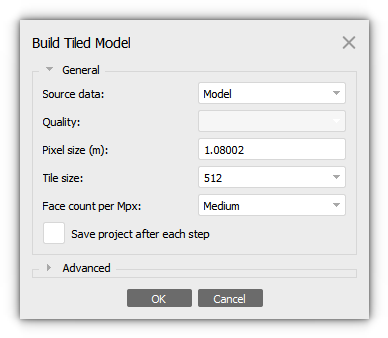
6. Click OK button.
